|
|
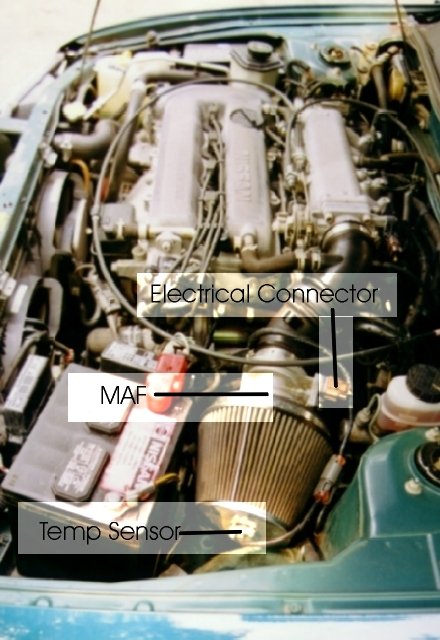
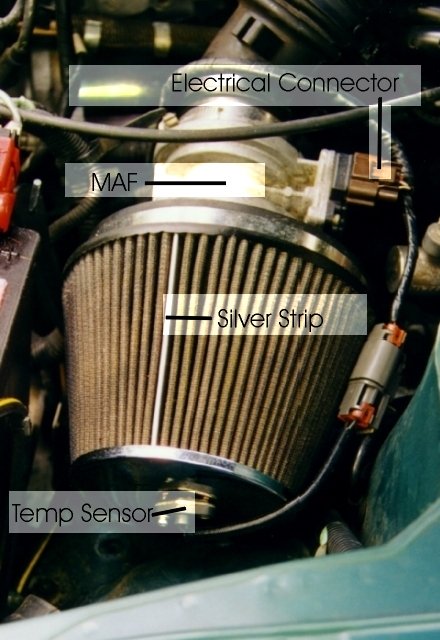
Intake InstallationWritten by Kieran Lavin For information on intakes, click here. This is specifically what I did with my '95 200SX SE-R. Sizes of bolts and screws are what I did and what worked on my car. You may find differently. Other things may vary with other models. Tools needed:
It would probably be a good idea to check with your dealer before installing your intake. Ask what their policy is about aftermarket parts. Some dealers will give you a hard time. They really shouldn't. Check out sema.org. They clearly state "With regard to aftermarket parts, the gist of the law is that warranty coverage cannot be denied simply because such parts are present on the vehicle, or have been used. The warranty coverage can be denied only if the aftermarket part caused the malfunction or damage for which warranty coverage is sought." Procedure
Warnings:I once put the stock filter back in for a few days. I had the Stillen filter out to clean it. The car needed to go in for scheduled maintenance. The Stillen filter was still wet (I had started about an hour earlier) when I needed to drop off the car. I figured that I would drop the stock filter back in. That turned out to be a mistake. After getting the car back from the dealer, I was in a rush to get the Stillen back in. I popped the clips and then started to loosen the bolts. The first bolt sheared right off! I think there were a few things which contributed to this problem. First, I was in a rush. Never do these things when you have a time constraint. Better to not have your new mod till tomorrow rather than not have your car for a few days (mine was down for 1 1/2 days). Second, I had just driven the car. The engine was hot. I know heat makes metals more maleable so I think this played a part in making the bolt easier to shear off. Third, I was not attacking the head at a perpindicular angle. I was at a slight angle. I think this added some stress to the bolt. Added to that, I had already popped the clips when I was trying to loosen the bolts. The filter was loose and this contributed to the horrible angle I was attacking the bolt at. Basically, just be careful. It took me forever to find the right kind of bolt. I got all of the bolts into the Stillen filter. I tightened all of the bolts and sheared off another head! The reason for this is a little more clear. This is why I'm telling you that shorter bolts are necessary. The stock filter does not have a back end. It goes straight through and is open. It can continue as far as is necessary. The Stillen filter, on the other hand, is a closed-end. Take a look inside and you will see that the hole doesn't continue through like the stock filter does. If you use the stock bolts and try to tighten them, they will go in as far as possible (which will not bring the head of the bolt flush). Continuing to tighten causes the bolt head to shear off. Not only did the head shear off but the bolt made another revolution or two after being as tight as it would go. This really screwed up the thread. I had to tap the bolt and even that didn't work. I wound up redrilling the hole through the broken bolt. Another tip, I used longer screws along with nuts on the inside of the filter to hold in the temperature sensor because it kept falling out on me. CleaningI picked up a K&N Filter Recharger Filter Care Service Kit (# 99-5000) for $10.99 at PepBoys. You can pick it up at most auto parts stores. Don't be embarassed to ask! It wound up being behind the counter where I went. I went by the K&N directions on the box. There are only a few things I wanted to mention.
The whole process takes a little while so leave some time. Do it some time when you're not planning on going back out for a while. Also, make sure that when you reinstall the filter that you're careful! It took me 3 full days to clean my filter because I wasn't careful and I was in a rush. Next time, I plan on bettering that! |