![]()
|
By Shell Black
After witnessing a radiator overflow bottle cavitate at full boil in the pits of Buttonwillow, I knew I would want to do a thorough job on the upgrade to Courtesy Nissan's Silicon Radiator Hoses (click here for the article) upon my return to Dallas after attending the 1999 National Convention (a 3,800 mile round trip).
First things first, I collected the essential products and fluids.
 |
Prestone Super Flush, Prestone coolant, Red Line Water Wetter, and multiple gallons of distilled water. |
I decided to try Preston Super Flush to remove as much crud that might be lurking in my cooling system - decreasing its efficiency. Just follow the directions on the back. Basically you will warm up the engine, drain, refill with water (or distilled water in this case) and Super Flush, run the engine, drain, run with water only and drain. You are going to have to remove the two front splash guards to gain access to the radiator drain plug and the lower radiator hose.
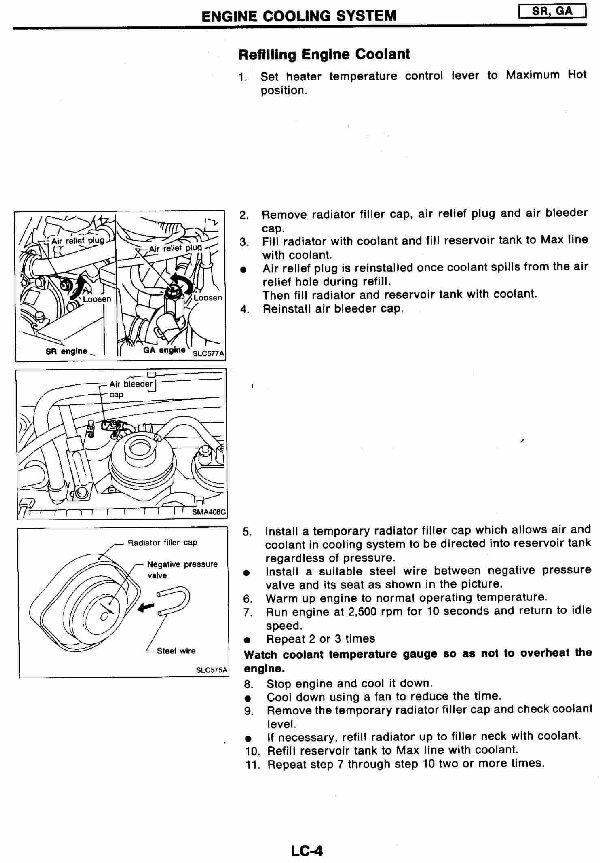 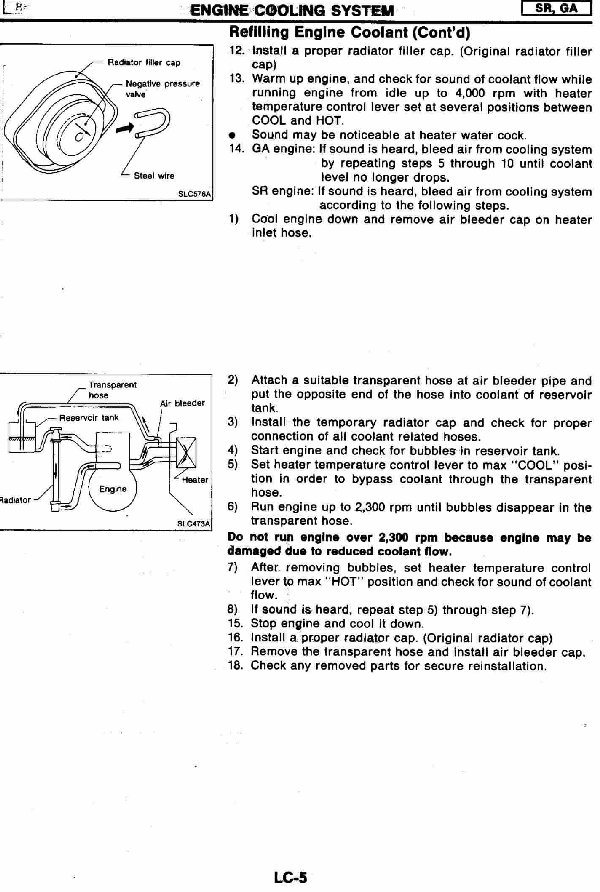 |
Instead of trying to make a synopsis of the procedure on draining and bleeding the coolant system, I scanned the pages out of the service manual. The bleeding process is a bit tricky so follow it step by step. |
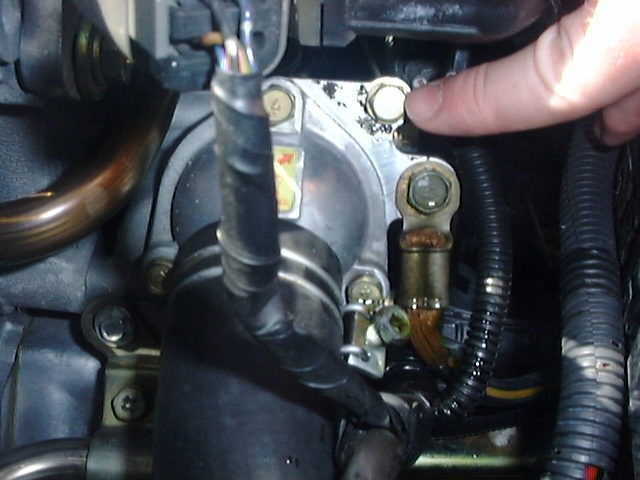 |
The tip of my finger is on the air relief plug, below the distributor |
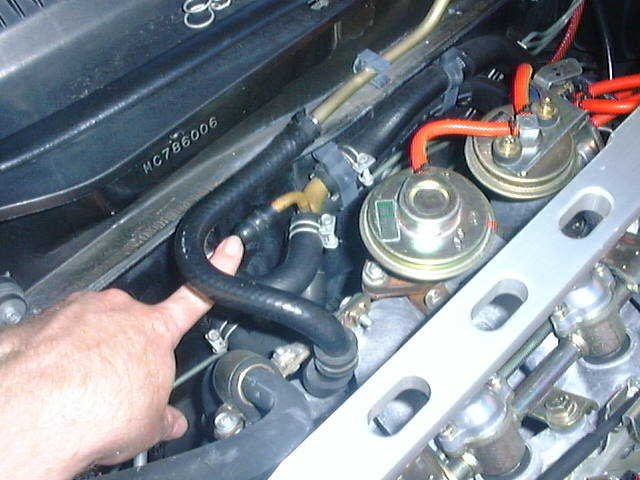 |
Finger on the rubber boot (air relief cap) that slides over the coolant bleeder near the firewall |
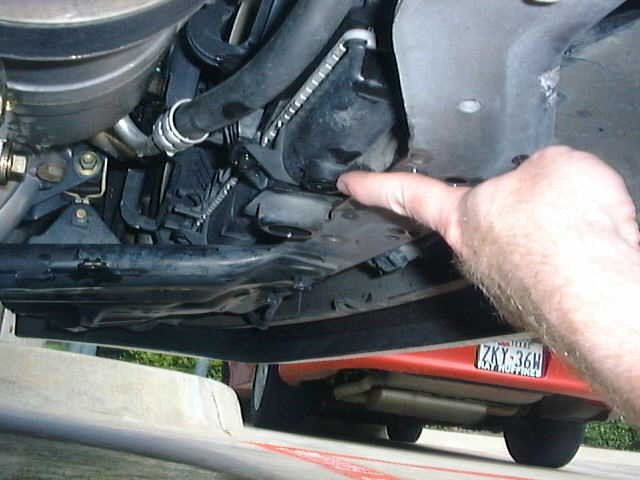 |
This is the Nismo radiator, but you get the idea. There is a plastic drain plug on the passenger side of the car. |
I carefully measured out my coolant mixture. I used a combination of Red Line Water Wetter ("Coolant System Heat Transfer Agent"), distilled water (I know, it's overkill but it is mineral free!) and antifreeze. According to the directions for Water Wetter you want more water than antifreeze (not a 50/50 mix) for optimum cooling. Mix in the ratio of Water Wetter as directed (1 ounce for every quart of coolant).
 |
The water outlet with the hose removed. By cupping your hand around the opening you can pour distilled water into and through the block. The water will spill out the other side of the block at the thermostat housing carrying along with it more contaminants and silt. I forced a good gallon or so of distilled water through the block using this method. With the hoses off I also poured a gallon or so through the radiator with the drain plug on and off, again, to get as much silt out of the radiator in hopes of better cooling efficiency. |
As mentioned before, I decided to replace the thermostat since I was going to have the hoses off. This is a fairly straightforward process.
 |
The thermostat removed before scraping / sanding off the remaining gasket material on the thermostat housing. You can also see that the air relief plug is removed. |
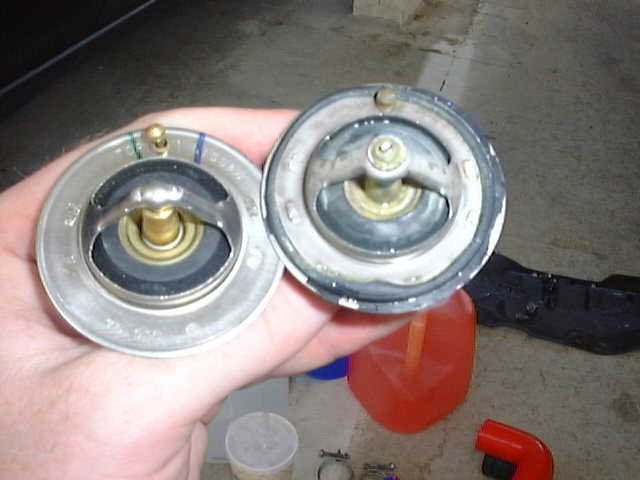 |
Though the old thermostat didn't look bad, it is a cheap part to replace. (21200-53J10 / 21200-0C810 $9.99 list $7.49 at Courtesy Nissan) |
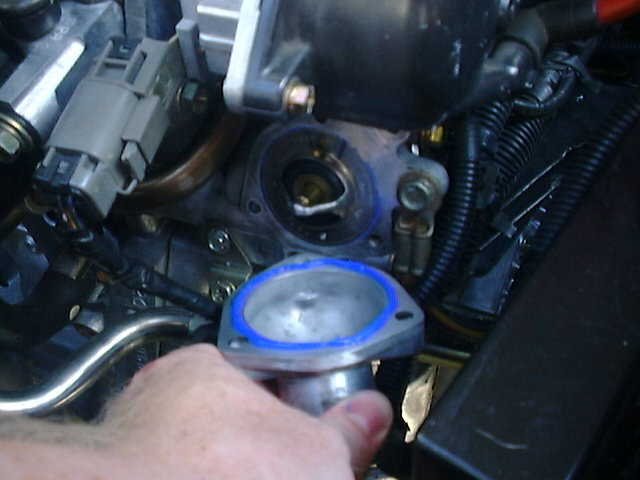 |
Putting the water inlet back on after being cleaned up and polished. The new thermostat is in place. The blue liquid gasket for some reason looks like it is glowing from the camera flash. |