![]()
|
|
|
|
|
QR25DE Balance Shaft Removal
![]() Written by Torry Skurski
Written by Torry Skurski
Before you begin, this modification will void your warranty. The staff of SE-R.net nor the author are responsible for any damages that may be caused by this modification.
The tools you will need for this project are the following:
Jack Stands
Floor Jack
10mm, 12mm, 14mm, 21mm, and E-14 Star sockets and socket wrench
10mm open end wrench
1/16" NPT tap and plug
1/4" drill bit and drill
Dremel with cut-off disc
Compressed air (or can of Air Duster)
Torque wrench
Red loctite and Grey permatex
Rags, needle nose pliers, screw drivers, oil pan are helpful
|
Removal: Begin by breaking loose the lug nuts on the front right wheel. Then jack up the front of the car and place the jack stands underneath. Remove the wheel to make more room. Remove the lower fender liner also. There should be 3 10mm bolts and 3 plastic snaps that hold this on. |
|
 |
|
|
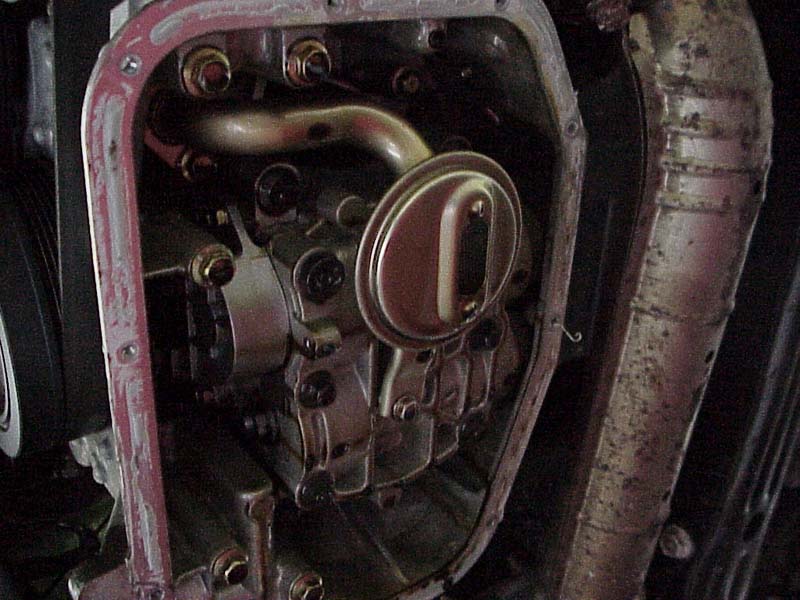
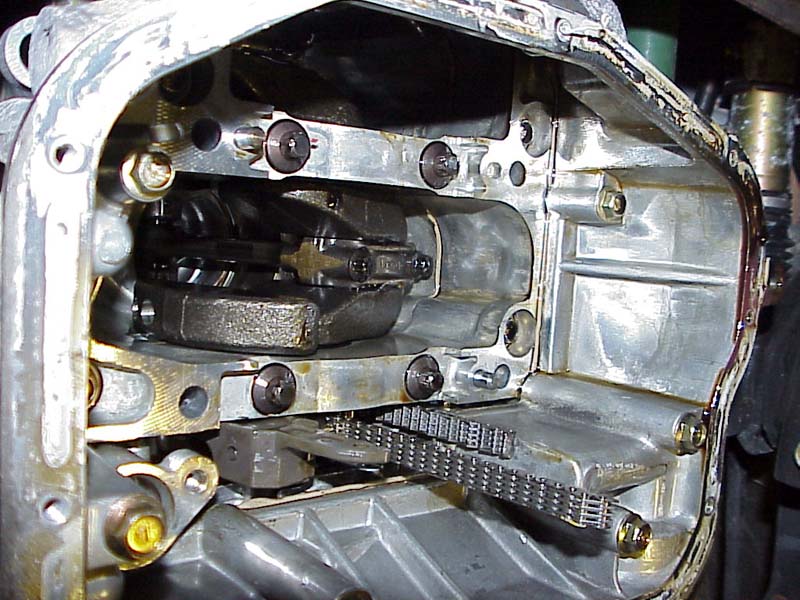
Next, drain the oil by removing the drain plug (14mm). Also remove the oil filter. Let the oil completely drain. Remove the numerous 10mm bolts that hold the lower oil pan on. Once all the bolts are removed, you will need to pry the pan off because it will be stuck on with the gasket. A method that works is to stick a pry bar in-between the block and oil pan. Tap it in with a hammer, then pry it apart. When the pan is removed, you will be able to see the oil sump and the balancer. |
|
 |
|
|
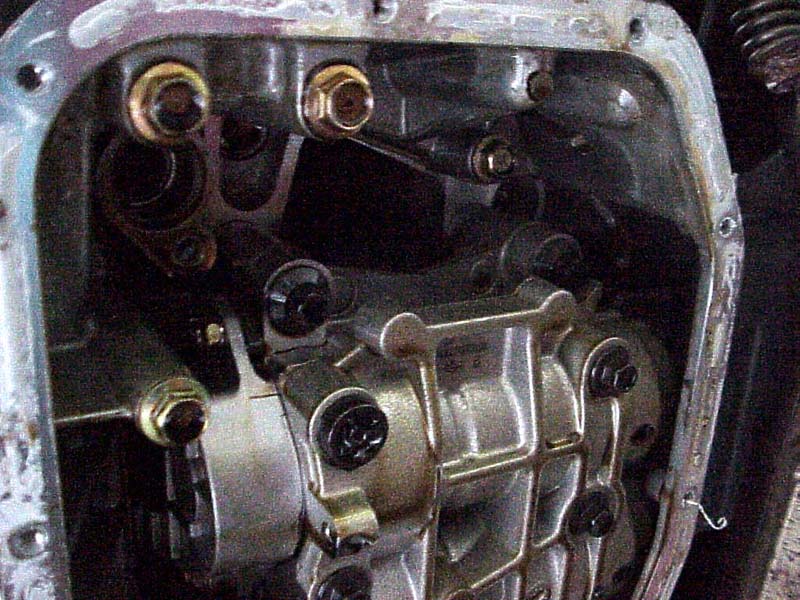
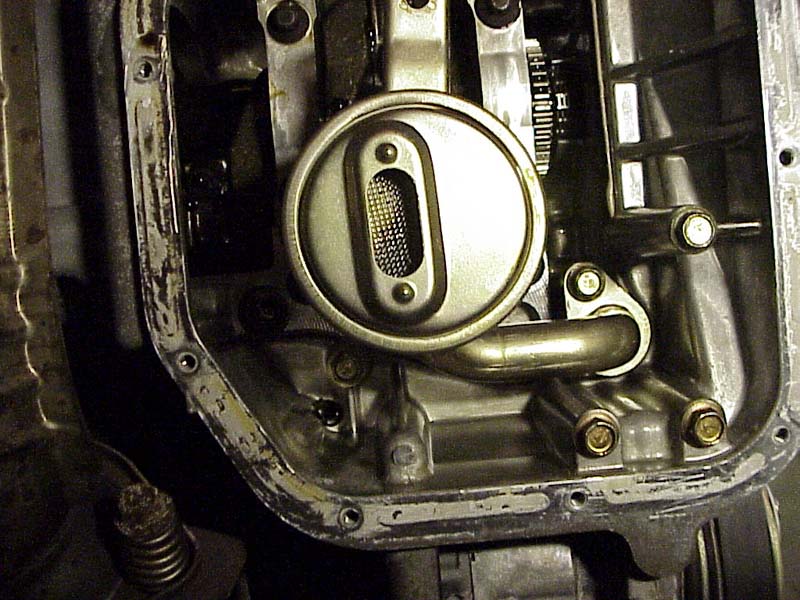
There are two bolts holding the oil sump on. One is a 10mm bolt that bolts to the balancer. The other is a 12mm bolt near the top of the oil sump. Remove these bolts and wiggle the oil sump off. There is an o-ring at the top that keeps it from falling down after unbolting it. |
|
 |
|
|
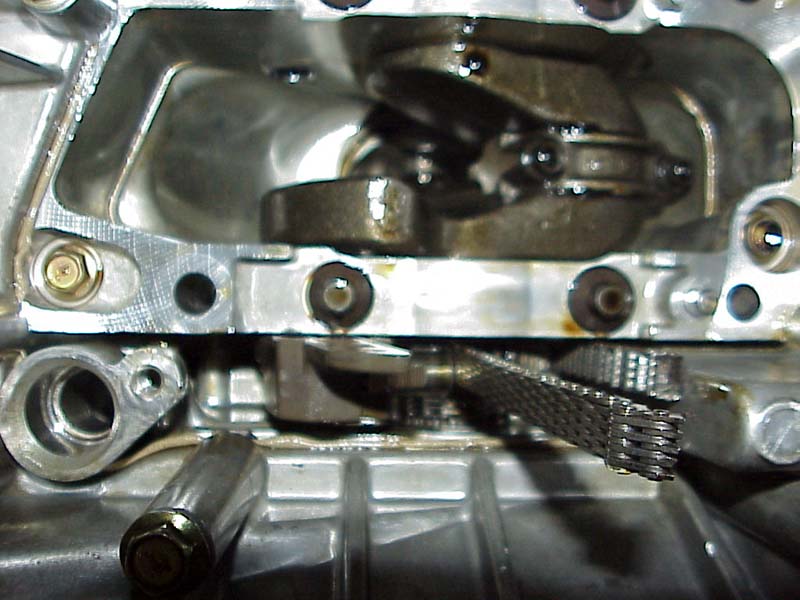
Notice the balancer chain guard in the picture above (on the left). There are two bolts that hold this on. These must be removed. Use an open end 10mm wrench to loosen these bolts all the way. One bolt will be easy to get out, however, the other will hit the front cover. You must loosen it completely, then use a cutting device (such as a Dremel) to cut the head off the bolt. This will allow room to pull it out. When both these bolts are removed, you will be able to remove the balancer chain guard and see the chain. |
|
 |
|
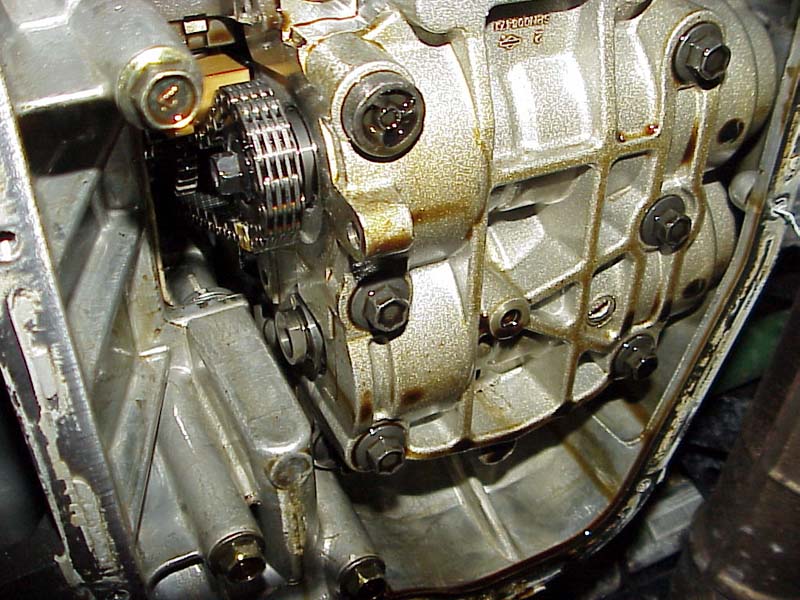
| The next step is to cut the balancer chain. Again, using a cutting device, cut the chain. | |
 |
|
|
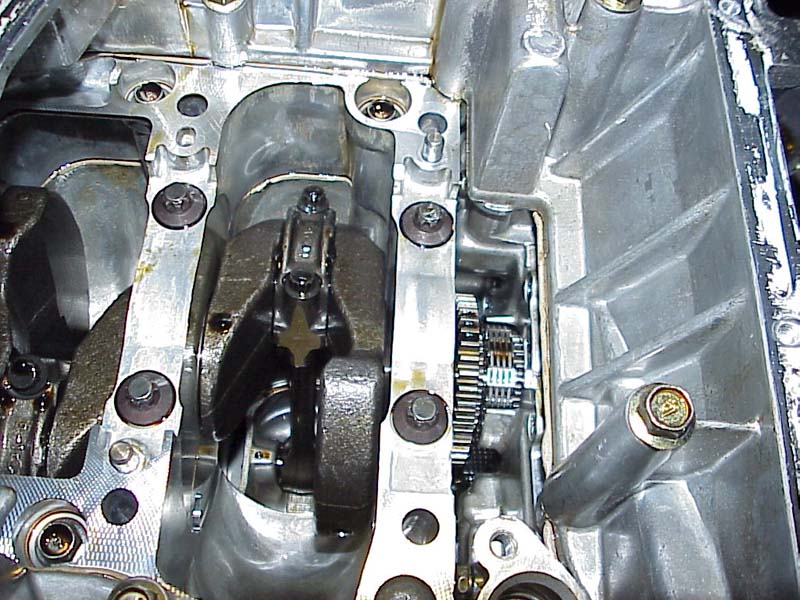
After the chain is cut, the balancer can be removed. You will need an E-14 Star socket to remove the main bolts. There are four bolts that hold the balancer on. Remove the four bolts. The balancer will not want to come out, but it will if you wrestle with it. It will take some maneuvering and prying, but it will come out. When it is removed, it will look like this: |
|
 |
|
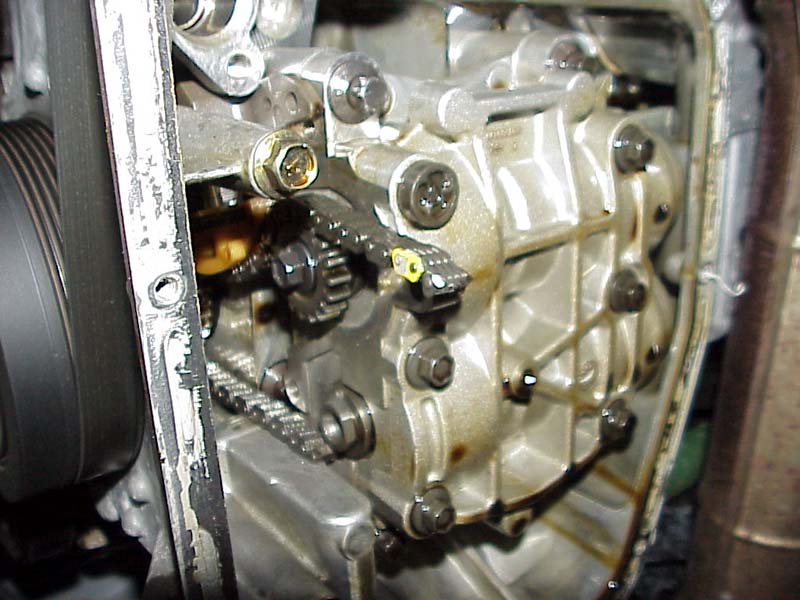
| In order to get the chain out, you must remove the tensioner. It is easiest to remove the yellow part of the tensioner (by sliding it off), then swing the tensioner up as far as you can. | |
 |
|
|
Use a 10mm open end wrench to loosen the top bolt of the tensioner. This is a tedious job and is hard to get out. But it is possible. Once the tensioner is removed, you can remove the balancer chain. |
|
 |
|
|
You will notice there is one oil galley that was previously feeding oil to the balancer. Use a 1/4" drill bit and drill into this oil galley about 1". Next, use a 1/16" NPT tap, and tap the hole. Use compressed air to blow through the hole where the oil filter goes. Make sure the entire area is free of shavings and dust from drilling and cutting the chain. Take a 1/16" NPT plug, apply red loctite, and screw it in to the hole until it fits snugly. |
|
 |
|
|
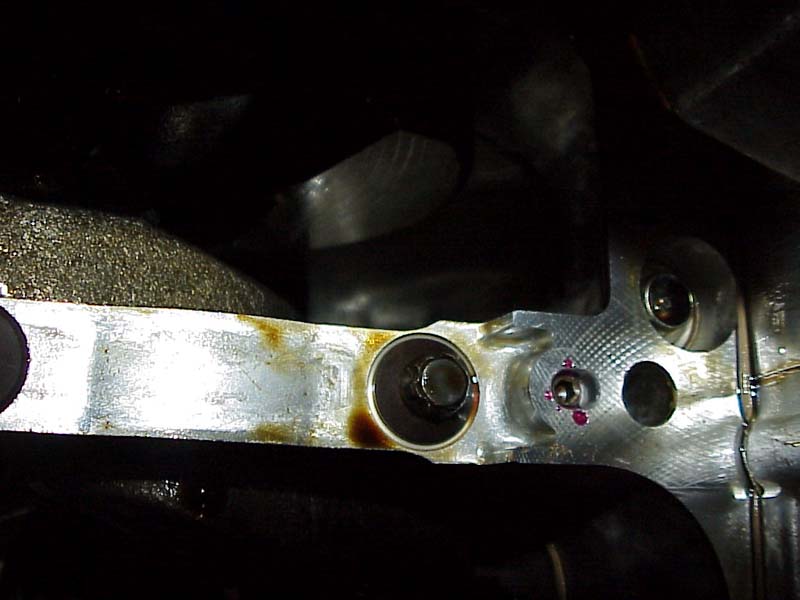
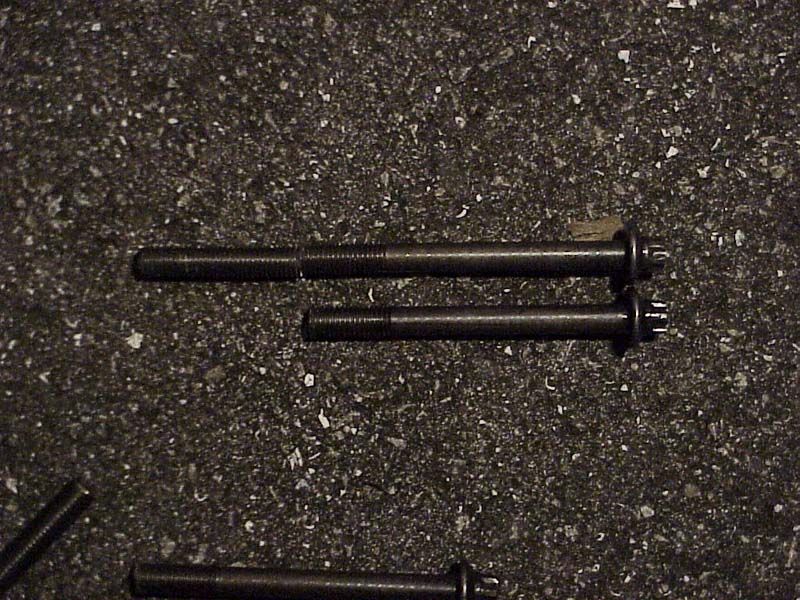
Take the four main bolts that were holding the balancer on and cut 2" off the end of each bolt. Without the balancer, they will bottom out. |
|
 |
|
|
Re-install the four bolts. The torque sequence should be criss-cross. Torque the bolts 34-37 lb ft, then an additional 90-95 degrees. Then loosen them, and re-torque them to the same sequence. Re-install the oil sump. You will not be able to bolt the lower bolt in on the oil sump due to the balancer being removed, however, you can still bolt the top bolt in. |
|
 |
|
|
Scrape the gasket surface on both the engine and the oil pan clean. Apply grey permatex to the oil pan. Allow it to dry for about 30 minutes or until it is tacky. Re-install the oil pan. Install a new oil filter. Put the lower fender liner back in. Put the tire back on. Lower the car and torque the wheel down. It is best to let the car sit overnight to allow the oil pan gasket to dry so that you do not have oil leaks. Because you removed a large area of material in your engine block, it now will take more oil. Add 6 quarts of oil and you are done! Make sure to start your car and check for leaks before you go anywhere! |
|
Originally posted on
www.nissaninfiniticlub.com