Homemade Cool Air Intake
Comments by Adam Cole
The Cool/Cold Air Intake (CAI) is one of the simplest things you can
do to improve your car's performance. Place Racing
CAI has been dyno'd and gives an increase of 8 HP at peak. It is generally agreed that
these intakes have a combination of factors working in their favor:
- They bring in cold air from the outside, which is denser than the air
under your hood.
- Finally, piping of the correct length and diameter has a constructive
resonance effect in certain rpm ranges.
(Place Racing CAI seems to help low-end power.)
- They are less restrictive than the stock system, which was designed
with silence rather than performance in mind.
Place Racing CAI is a well crafted product, but may be more
than you want to spend. The good news is that you don't have to spend a lot of money to
enjoy the benefits of a CAI. If you are somewhat handy, you can make your own CAI
economically from simple, readily available materials, at a total cost of $36 (not
including POP filter).
I was very pleased with the results on my '91 SE-R. I added a
freeflow exhaust with large-diameter piping at the same time, which is supposed to
decrease low-end punch. But with my homemade CAI, the car pulls harder than before at low
rpms, and continues to pull up to the redline. It also sounds great when you open it up!
Of course, the effect of any modification depends on your existing mods, especially with
breathing mods, where effects are cumulative.
Being a bit bull-headed, I didn't necessarily do things the easiest
way -- I relocated the MAF to the fenderwell, for instance, and I had to sort of jury-rig
the battery mounting as a result. Still, one could easily adapt the procedure -- it's
pretty general. For instance, this procedure is built around the JWT POP charger, but you
could probably just use the top half of the stock airbox, or use a different filter
altogether. Lay everything out beforehand, and alter the procedure to suit. Usual
disclaimers apply -- be careful, especially when drilling or working under the car.
Remember the carpenter's watchword: measure twice, cut once! There are several other
maintenance items which are conveniently accessible during this procedure: throttle body cleaning, battery relocation, and clutch adjustment. I recommend doing all of
them. It is a good idea to check your timing and idle speed adjustment after you finish, especially if you
clean out the TB; mine was way off.
Car: 1991 Sentra SE-R
Materials List: (all from Home Depot)
JWT POP charger - optional (I had this
already)
| Quantity |
Item
Description |
Cost |
| 1 |
Black 3" ABS pipe segment (had to buy
10' length) |
$9.00 |
| 2 |
45 degree street ells (3" ABS) |
$6.04 |
| 1 |
Male 1/2" NPT-5/8" hose barb
elbow (AB brand) |
$2.38 |
| 1 |
Male 1/2" NPT-1/2" hose barb
elbow (AB brand) |
$1.75 |
| 1 |
Plumb-Quik brand 'Quik Ell' (3"
rubber 90-deg ell) |
$5.95 |
| 1 |
Plumb-Quik 3" Flex Coupling (3"
rubber sleeve) |
$3.98 |
| 1 |
12" X 12" X 1/8" red rubber
gasket material |
$4.94 |
| 3 |
2' 12-gauge stranded wire |
$0.96 |
| 1 |
various wire splicing connectors |
$0.75 |
| Total Cost |
$35.75
|
Tools:
- Jack and jackstands
- 3" hole saw and drill arbor
- Electric drill w/ assorted bits
- 3/4" spade bit
- Drill-mounted grinding stone
- Heavy-duty cutting pliers
- Bench grinder (optional)
- Open-end + box wrenches
- Ratchet set w/ wobble + extensions
- Assorted screwdrivers
- Assorted pliers
- Tap, 1/2" NPT (I used a tool for rethreading plastic sprinkler
risers)
Time estimate:
Who knows? Took me a day. I work slow, I was lying out in the mud,
and I was experimenting. You might do it a lot faster!
Procedure:
- Jack up the front of the car (chock wheels, use stands -- don't rely
on the jack alone) and remove the splash shield in the front wheel well (depress the
square centers of the black plastic fasteners to remove them).
- Unbolt and remove the stock air collector from the fenderwell. (Try
sucking air through this box yourself, and see how restrictive it is!)
- Remove the entire stock intake tract from throttle body to
fenderwell, including the black plastic resonator. You should have 4 loose hoses at this
point, or only 3 if you've put the little JWT filter on your AIV already.
- Disconnect and remove the battery and battery pan. This would be a
good opportunity to relocate the battery to the trunk - I didn't do this, and wound up
doing kind of a hack job on the reinstall. It helps to remove the 2 fuse blocks as well --
I ended up zip-tying these to nearby support members at the end of the job, because I
hacked up the stock mounting points pretty good.
- After measuring and checking fit on both sides, carefully drill a
hole in the fenderwell using the hole saw. If you're leaving the battery in front, you'll
want to locate this as close to the rear left corner as possible. Also drill 4 holes for
the MAF-to-POP bolts. It helps to make a cardboard template for this part.
- Make 2 identical gaskets from a suitable material. I used 1/8"
thick red rubber. (If you go this thick, you will need to use longer bolts than the ones
supplied with the POP charger.)
- Unfortunately, the underside of the engine well is not smooth like
the top side. You'll have to grind down the ridges on the underside of the sheet metal to
make a smooth mating surface for the aluminum ring of the POP. (I think this is the hard
way to go, as this would all be unnecessary if you left the MAF in its stock location.
Then, you could just put a section of pipe through the cutout, and fabricate your own POP
adapter that you could bolt to the sheet metal. With my MAF placement, I needed an
airtight seal at this junction.)
- Bolt the MAF and POP together on opposite sides of the fenderwell,
using the 2 gaskets you made. Don't torque too hard; you are dealing with aluminum here!
Seal these with permatex or RTV if you want to be extra safe, especially if your hole
placement overlaps the existing oblong cutout for the stock air funnel as mine did.
- Sever the MAF harness near the connector, and splice in an extra
18" of wire. Tee off a ground lead to an engine block ground lug if you haven't
already. Plug in the spliced connector to the relocated MAF and test for continuity.
- If you aren't relocating the battery to the trunk, check the fit. You
may need to move the battery a few inches toward the engine block -- for me, this involved
some surgery on the battery pan using cutters and a bench grinder. Reinstall the pan (make
sure you account for any chassis electrical grounds you disconnected).
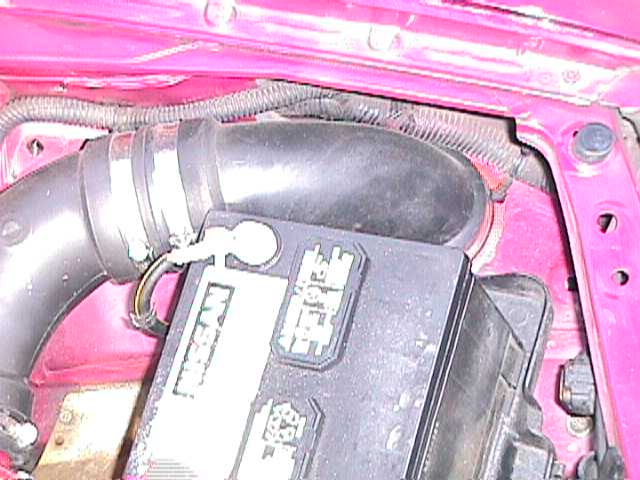
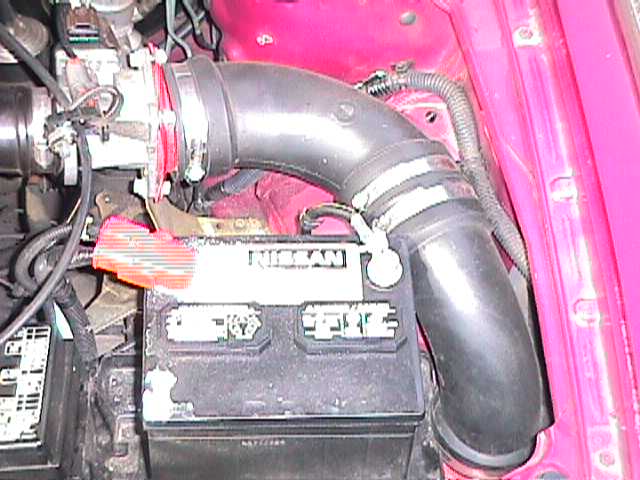
- Lay out the intake piping: The 3" rubber sleeve fits over the
TB, secured by a hose clamp. Then come the 2 street elbows, followed by a straight piece
of pipe which you will need to cut to size. The rubber elbow gets you from there to the
MAF. Tighten it down and scribe mating marks. You will need to connect the small vacuum
hose, as well as 2 bigger hoses (these are the PCV and cold-start fast-idle throttle
bypass hoses). You will be using the 1/2" NPT elbows for these. Mark the best
locations for these (I put one in each street ell).
- Take the assembly back out of the car. For the small vaccuum hose,
drill a tiny hole in the rubber piece that abuts the TB, then force the tiny plastic
vacuum hose adapter through it (make sure this doesn't get clogged). For the 2 bigger
pipes, drill suitable pilot holes, then use your NPT tap to make the threads. Install the
2 plastic elbows -- the 5/8" barb fits the PCV hose, and the 1/2" barb goes to
the throttle bypass. Clean out all the burrs from inside the piping, and reinstall. You
can use ABS cement or RTV sealant to seal it up for good once you are satisfied with the
fit and performance.
- Reinstall the splash shield and lower the car. Go for a test drive!
Smile!
|