SE-R engine compartments are crammed full, so you're probably
wondering where you're going to find space to put your air horn. I'll
tell you where I found mine, but good luck.
First, count up your nuts and bolts. If your horn doesn't have
enough mounting bolts for the compressor and its two or three horns, buy them ahead of
time. I also had a bracket (about 6" long) with a slot in it for variable mounting of
the air horns (from a previous installation). It was handy.
Next, you need a soldering iron and 60/40 resin core solder and
about 3' of electrical wire to extend the original horn wire. Get some black electrician's
tape (or shrink-fit plastic insulator) to keep the bare wiring from shorting.
Get a blade connector for the compressor ground wire (find a
dangling one off your car or off a junker). If you're a neatnik, buy a spade connector for
the other end of your ground wire. Make a ground wire about 8" long with blade
connector at one end (spade at the other is optional).
Buy a box of 15 amp fuses, too. 200SX SE-Rs use mini blade fuses.
Classics may use standard blade fuses (I don't know).
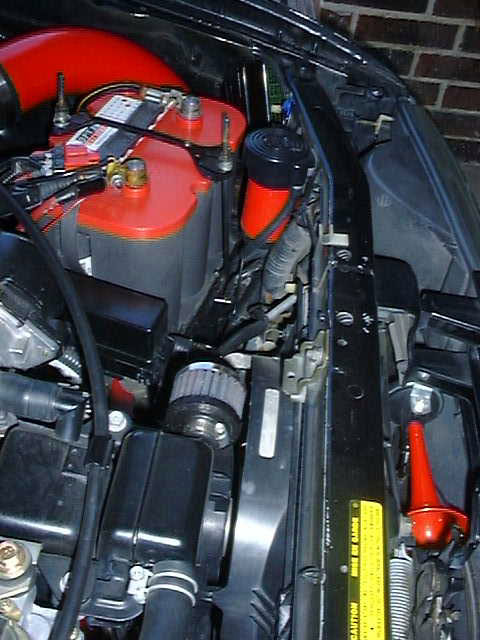
- Mount your air compressor. On my 200SX SE-R, there was a lot of space
on the left fender. I drilled a hole through the reinforcement groove for mounting. (When
you open your hood, this is the innermost flat area of the fender). Even though the only
bolt I had handy was about 1-1/2" long, and it sticks up through the groove, there's
no interference with the hood. Drill the hole large enough to get your air compressor
mounting stud/bolt through it. Put the bare or spade end of your ground wire around the
bold and snug down the nut/locknut/washer-nut to hold the compressor.
- Extend your original horn's hot wire to the compressor. This requires
some soldering skills, although you can crimp the wires with solderless connectors from
Ratshack if you're electrically-challenged. I recommend solder, as you'll be pushing 15
amps through the circuit. Insulate your bare solder connections with electricians tape or
shrink-fit insulation. Plug the hot and ground wires into your compressor.
- Mount the air horns. You want them outside the engine compartment, or
the sound gets blocked by radiator, block, fenders, etc. I removed the OEM horn and bolted
my slotted bracket there. The other end of the bracket holds two air trumpets pointed
downwards. I removed a bolt from the hood release lever mount and put my third air trumpet
there.
- Connect the air tubing from the compressor to the trumpets.
- Replace the stock 10 amp horn fuse with your 15 amp fuse. I've been
told the relay is rated at 15 amps and your compressor is going to draw >10 amps, so
put a 15 amp fuse in. On the 200SX SE-R, the fuse I'm talking about is in the fuse box in
the engine compartment aft and inwards from the battery.
- Blow your new horn. If no noise comes out, you probably reversed your
hot/ground wires and blew your fuse. Reverse the ground/hot wires and your horn fuse (you
did buy a box of 5-15 amp fuses, right?) and try again. Your new horn sounds cool, doesn't
it?
Let's face it, the stock horn is wimpy. Air
horns certainly give our cars some needed gusto. After a few rallies I had seen a
lot of different approaches to installing Air Horns on a SE-R. I only liked a few
because so many had the horns mounted somewhere in the engine bay, or they were not using
a relay. One of the better installs was done by Rick Zotz who had Fram horns in front of the
radiator, but behind the grill. This seemed to be the best mounting position (close
to the OEM horn mounting position and where the sound from the horns could best be heard
on the street or track). Next stop was Courtesy Nissan (800/527-1909) who carries
the Hella Air horn kit (Courtesy's part number 99996-85105 for about $40). The
process took a couple of hours taking my time to double check the clearance of the horns
and compressor, and finding suitable mounting points. Even though I have the
compressor close to the horns for instant sound, I still was a little short on the length
of clear tube from the kit, so I used fuel hose of the same diameter. The notes and
the pictures walk you through the install:
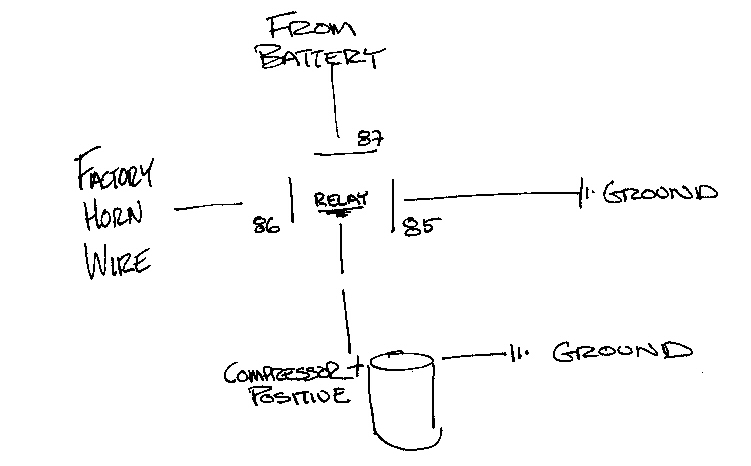
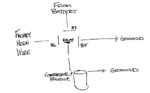 This is a black
& white sketch of how to wire your relay and horn. The relay is in the center
and I have put in the numbers that correspond with the contact points imprinted on the
plastic case of the relay. The numbers are small on the case - look close, they are
there.
This is a black
& white sketch of how to wire your relay and horn. The relay is in the center
and I have put in the numbers that correspond with the contact points imprinted on the
plastic case of the relay. The numbers are small on the case - look close, they are
there.
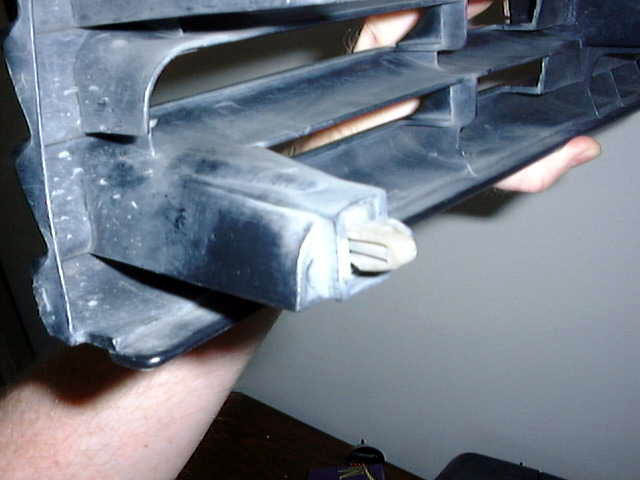
 Pinch these tabs and your grill
will come free.
Pinch these tabs and your grill
will come free.
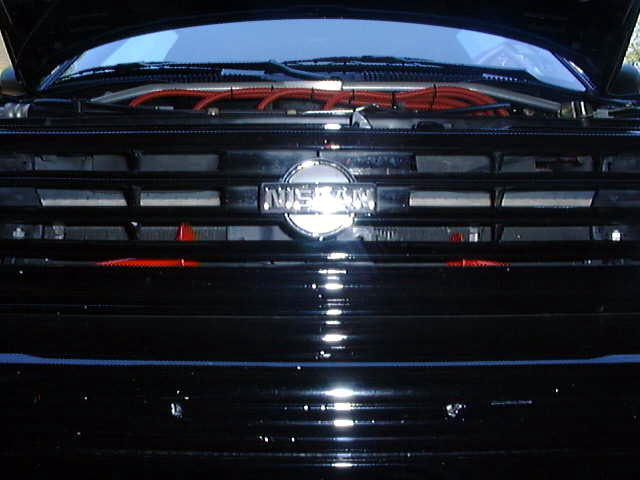
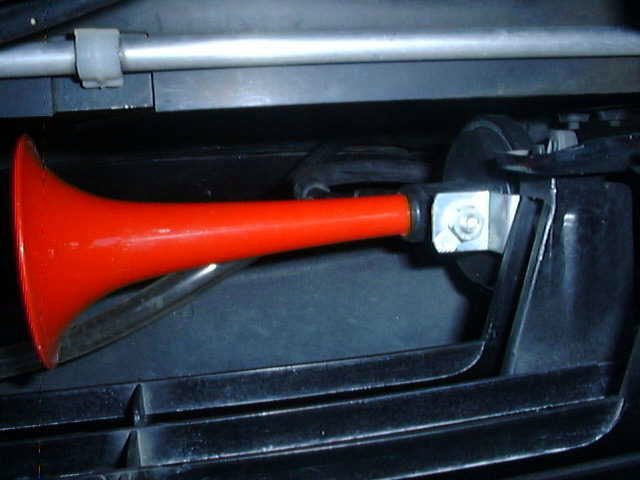
 What are those red things behind
that grill - air horns!
What are those red things behind
that grill - air horns!
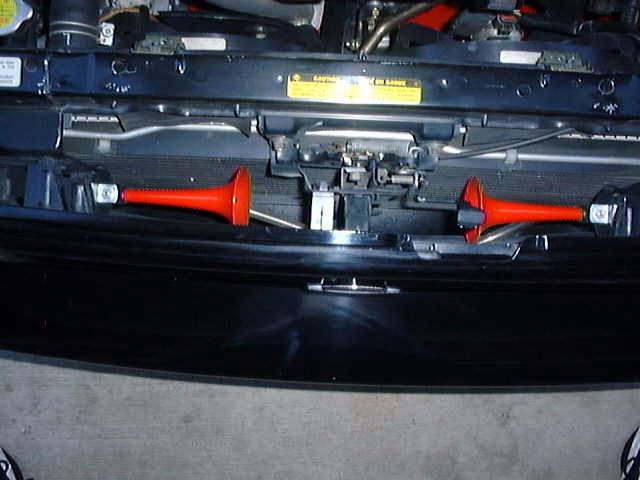
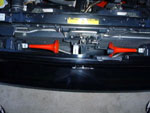 Plenty of clearance for the
hood release. Your air horns are located behind the grill but in front of the
radiator so they will be nice and loud on the street.
Plenty of clearance for the
hood release. Your air horns are located behind the grill but in front of the
radiator so they will be nice and loud on the street.
 A shot showing the bracket
attached to the lower arm of the grill. With the grill off the car you can drill
into the bracket from the bottom up. I used the small brackets that came with the
kit.
A shot showing the bracket
attached to the lower arm of the grill. With the grill off the car you can drill
into the bracket from the bottom up. I used the small brackets that came with the
kit.
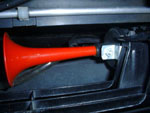 Close up of horn on right side.
You can't really see it, but below the horn is the T-connector from the kit.
The clear tube goes to the left horn, the black tube is fuel line which goes down and back
and snakes through to the engine bay via the right headlight opening.
Close up of horn on right side.
You can't really see it, but below the horn is the T-connector from the kit.
The clear tube goes to the left horn, the black tube is fuel line which goes down and back
and snakes through to the engine bay via the right headlight opening.
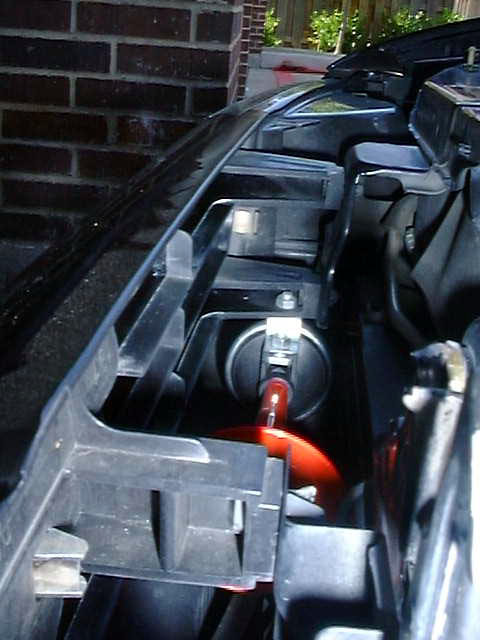
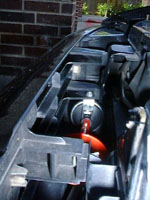
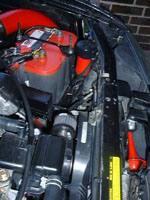 The black fuel line has come
through the headlight opening and now joins the red compressor canister. I drilled a
whole into the top cross member to mount the compressor so it would still be close to the
horns for instant sound, and still have clearance for the headlight assembly and hood.
The black fuel line has come
through the headlight opening and now joins the red compressor canister. I drilled a
whole into the top cross member to mount the compressor so it would still be close to the
horns for instant sound, and still have clearance for the headlight assembly and hood.
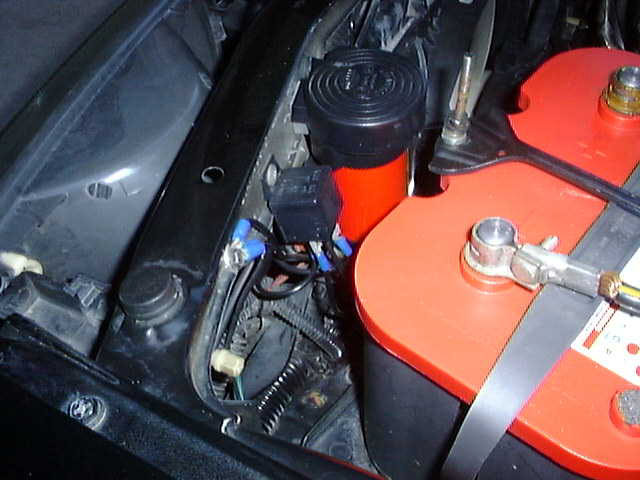
 Here is the relay
mounted right next to the compressor. The ground is next to the relay on the frame.
Here is the relay
mounted right next to the compressor. The ground is next to the relay on the frame.