|
|
Sport Compact Car - December '97Project Sentra SE-RBy Dave Coleman [Put into HTML format by Pat Griffith] From used car blues to Type-R track manners in one easy session. Photography: Les Bidrawn, Dave Coleman In our test of the Integra Type R back in May, we were amazed by how well that car did just about everything, but the front driver's balanced cornering attitude really stood out. "Front-wheel drive cars," we stated, "absolutely always understeer. The Type-R just changed that." While we still stick by that statement, we have to add one more car to the list of exceptions. Our 1991 Sentra SE-R tackled the same tricky road course at the Streets of Willow Springs with the same balanced handling as the Type-R, albeit with a little less velocity. But we're getting ahead of ourselves, time to introduce our latest project.
Introductions Nissan has a long, established pattern of introducing great cars and slowly watering them down over several years. The classic Datsun Roadster reached perfection in 1967, and slowly got taller and more awkward until it was replaced with the 240Z in 1970. The Z did the same thing, slowly morphing from an elegantly simple sports car to an obese boulevard cruiser until it was finally re-born as the fabulous-but-expensive 300ZX. The 240SX also began as a taut, if slightly underpowered sports car, and later gained weight and had its sports car aspirations diluted as it entered its second generation.
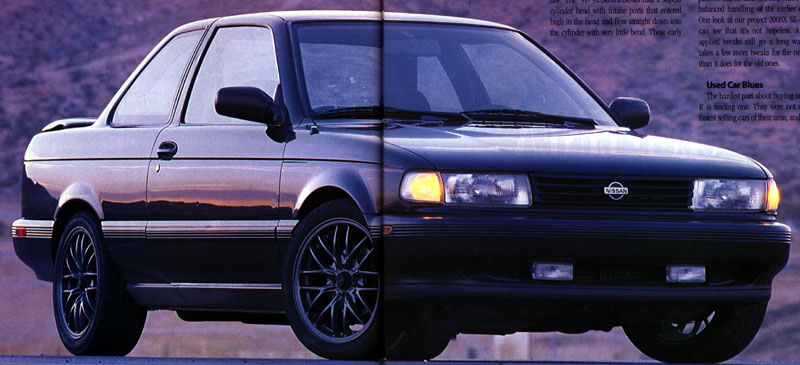
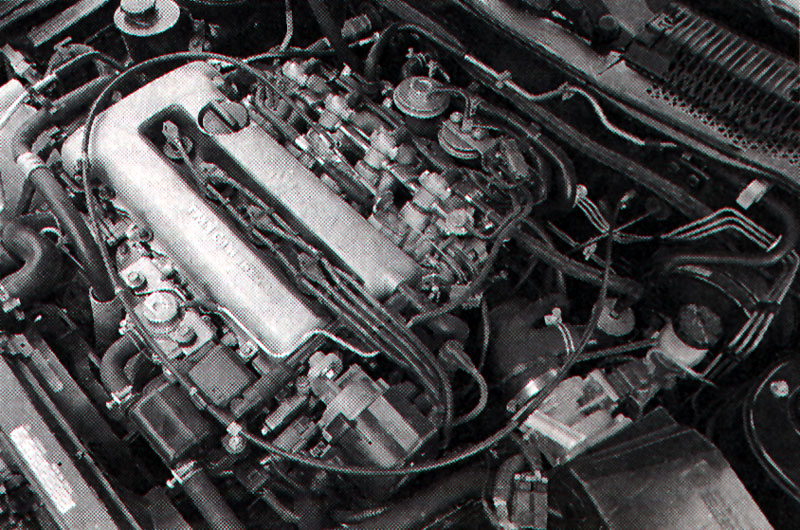
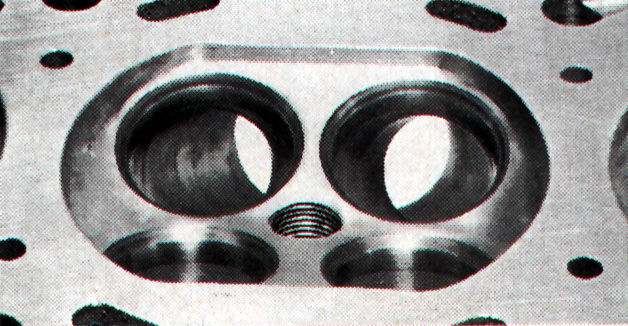
The SE-R has not completely escaped this fate. The '91-'92 Sentra SE-Rs had a superb cylinder head with intake ports that entered high in the head and flow straight down into the cylinder with very little bend. These early engines are recognizable by their inverted intake manifold that places the plenum and throttle body down low behind the engine-much like the 1994-1997 Integra GS-R's B18C engine. 1993 and later SE-Rs have intake ports which enter lower in the head and have to bend more sharply to enter the cylinder, reducing flow at high-rpm. These have a more conventional-looking intake manifold with the plenum on top. The Sentra SE-Rs also had a relatively taut stock suspension designed to deliver well-balanced handling at the expense of a slightly stiff ride. The 200SX SE-R, on the other hand, has much softer suspension tuning, and replaces the Sentra's multi-link strut rear suspension with a well-located, but less capable multi-link beam. The newer rear suspension has no anti-roll bar, which means the balanced handling of the earlier car is lost. One look at our project 200SX SE-R and you can see that its not hopeless. A few well-applied tweaks still go a long way, it just takes a few more tweaks for the newer SE-Rs than it does for the old ones.
Used Car Blues Just a few weeks after buying the car, though, things started going awry. Blasting down the freeway one day at full throttle in fith, the tranny suddenly popped out of gear. Over the next few weeks it began popping out of fifth gear on a regular basis. (After speaking with several SE-R enthusiasts, it seems that a worn out fifth gear is a relatively common problem on early SE-Rs.) To make matters worse, both CV joints started making noise, and both front tires started going bald at an alarming rate. Not wanting to tear into the transmission or get our hands dirty with the nasty goop they put in CV joints, we took the car in to our local Nissan dealer and started crossing our fingers that the previous owner's extended warrantee would transfer over to us. In the end, we ended up needing a new fifth gear, a new shift fork, fifth gear synchros, and basically everything that touches fifth gear. While the transmission was out, we also decided to have the clutch replaced. Given the pristine condition of the car, (it looked like it had been cleaned daily with tweezers and a feather duster) it seemed like a good bet that the previous owner drove like a wuss. If so, it followed that the clutch was probably still original, and with 75,000 miles on it, that original clutch would inevitably need attention soon. With the car torn apart at a Nissan dealer already, the choice for a new clutch was obvious. Nissan Motorsports offers performance and racing parts for everything from Datsun Roadsters to 300ZXs. They also happen to carry Centerforce clutches for SE-Rs, and any Nissan dealer's parts department carries Nissan Motorsports parts. Our performance clutch upgrade consisted of telling the service manager "Put a Nissan Motorsports clutch in there while you're at it." What could be easier? We also considered switching to a lighter flywheel while we were in there, but the stock SE-R flywheel is exceptionally light already, so there is little to be gained by making it lighter.
In case you were wondering, the extended warrantee did end up paying for the transmission and CV joints, so the $1500+ bill for driveline repairs was avoided. Lucky for us--it would have been a little more difficult to argue the merits of building a 7-year old sport compact car instead of a new one if we had to shell out over a thousand dollars just to keep the car on the road. The new Centerforce clutch is firmer than stock, but still relatively light with a very smooth engagement. Interestingly, the slightly-heavier pedal and stronger engagement gives the whole car a tighter, more connected feel. It's an interesting psychological effect that a lot of manufacturers could learn from. Sporty cars that feel sporty even on that test drive with the white-knuckled salesman in the car should have better sales potential.
Making it handle
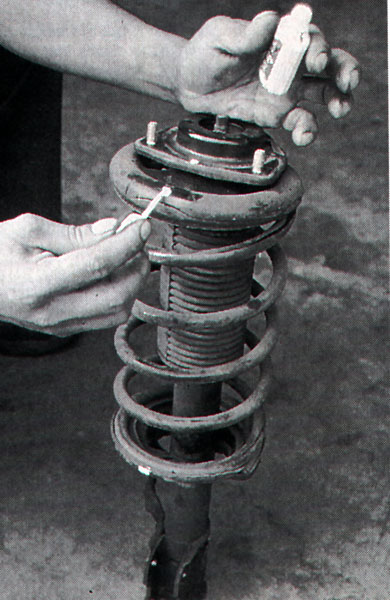
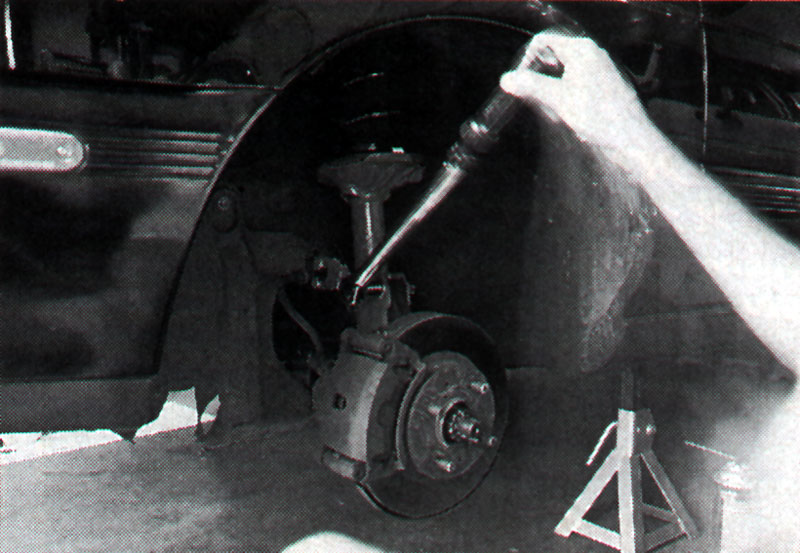
We wanted to use springs and shocks from the same manufacturer based on the possibly-erroneous assumption that they would have well matched spring and damping rates. Every spring manufacturer and every shock manufacturer will have different priorities when making a new high-performance spring or shock absorber. If you end up with springs that were biased to the extra-stiff side, and shocks that were designed to be cushy-soft, you could have a car that bounces down the road like a mini-truck with polyurethane bump stops, and handles much worse than a stock car. Of course, chances are that most manufacturers will have somewhat similar ideas of what performance suspension components should do, so the mismatch shouldn't be that bad, but it seemed safer to get springs and shocks from the same manufacturer. After our positive experience with the Tokico springs and shocks on Jackson Racing's Civic (SCC October, '97) we decided to give them a try on our SE-R. Installation of the springs and shocks was about as simple as it gets. Since we didn't have a spring compressor handy, we simply removed all of the struts fully assembled, took them and the new springs and struts down to the Wheel Warehouse, the closest well-qualified suspension shop, and had them use their spring compressor to mount the new springs and shocks. If you're on a tight budget, this can be a great way to save a lot of the labor when getting new springs and shocks. The only unexpected complication removing the struts was removing the rear seat to access the tops of the rear struts. To remove the seat back, you first have to remove the bottom of the seat, which is held in with two hidden latches. If you feel along where the front of seat where it meets the carpet, you will find the secret latches, and everything will come apart easily after that. Often it is necessary to trim the bump stops when lowering a car to prevent them from coming into play during hard cornering. Ideally, the bump stop should only come into play in extremely hard bumps; if the suspension hits the stops during hard cornering, the tires can suddenly loose grip. When Wheel Warehouse separated the springs and struts, we noticed that the front bump stops were extremely short already, and were also very soft. Soft enough that they could even be compressed by hand. Because they were so soft, if the suspension bottoms out in a corner, the change in spring rate (resulting from the added force of the bump stop) will be more gradual, and therefore less of a detriment to handling than if it were extremely hard. It also means that if we cut it, there might not be enough bump stop left to protect the strut from bottoming out internally. The rear bump stops were a different story. They are quite a bit longer than the fronts, and also qutie a bit stiffer, so we decided to trim them. Since the top of the bump stop fits into the strut top, and the bottom of the bump stop is moulded into the dust boot, we had to cut the middle section out of it, and re-install the bump stop as two pieces.
One final note on re-assembly of the suspension, the Tokico springs have just barely enough pre-load to stay seated in the spring seats when the suspension is unloaded. It's important, therefore to make sure the spring is properly seated before the car is placed back on the suspension. The plus side of this is that you don't need a spring compressor to put the new springs on the struts, but make no mistake, you definitely do need a spring compressor to remove the old springs! For wheels and tires we wanted to run a 16-inch setup, but didn't want big heavy wheels slowing the car down, or adding unsprung weight to the suspension. The wheels we found, 16X7-inch Black Racing Phantom N-1s (available from AKY USA), weigh only 15 pounds, yet are strong enough to stand up to real world roads. We talked to John Norris who runs these exact same wheels on his 240SX that he races in the Professional Sports Car series. The Phantoms, he says, are 2-pounds lighter than the wheels his competitors are racing on, and, while his competitors repeatedly bend their wheels, he has never bent a wheel. The stock SE-R wheel has an offset of 38mm, while the Phantoms were 45mm; we ran a 5mm spacer to bring the offset back to 40mm, which is exactly close enough. With 205/45-R16 Nitto NT505s, the front tires clear the wheel wells just fine, while the rears would just barely rub on the rear fender lip on big bumps until we folded the lip in slightly. With the suspension installed, we took the car back to Wheel Warehouse for an alignment. The SE-R is adjustable for camber and toe at both the front and rear, so no elaborate camber plates or special camber-adjusting parts are necessary. As we expected, the alignment was well out of spec. With just the springs and shocks in place, we took the SE-R out to the Streets of Willow Springs, the small, tight road course adjacent to Willow Springs International Raceway. We were shocked at the handling! On the street the ride was firm, but not punishing, but it did seem like it bounced a little on sharp bumps, making the suspension seem slightly under damped. We feared that on the track this might translate into an inability to maintain grip on anything but the smoothest corner. (Tokico's Illumina 5-way adjustable shocks aren't available for the Sentra, so we were stuck using their non-adjustable shocks, otherwise we might have tried dialing out the bounce.) All our doubts about the suspension vanished when we reached the track, though. At speed, the suspension enters it's element; no matter what bumps it encountered on the track, the suspension always settled right back into position. Around corners, the car turned in incredibly well, could actually be induced into slight oversteer under hard trail braking, and would power out of corners in an easy four-wheel drift. (The SE-R's stock limited slip differential proved indispensable when powering out of corners.) It only took a few laps for us to give up on the idea of adding an adjustable rear anti-roll bar. The car was perfectly balanced with the stock bars. (That last statement should be a hint to owners of non SE-R Sentras. The suspensions are the same on all 1991-1994 Sentras, so with the same Tokico springs and shocks we used and the stock SE-R sway bars, any Sentra will handle like this. The front SE-R anti-roll bar is Nissan part number 54611 69Y11, and the bushings are part number 54612 58Y10. The rear SE-R anti-roll bar is part number 56230 69Y00 and the rear bushings are 56243 69Y10. You need two bushings for each bar, and the bars retail for about $100 for the front, and about $85 for the rear, much cheaper than most aftermarket bars.) The Nitto tires, while not the stickiest tires available by a long shot, behaved quite well on the track. Their breakaway was smooth, consistent, and predictable, and a tire that breaks away smoothly and predictably will often allow you to drive faster than a tire with lots of grip that lets go suddenly. More impressive was the fact that after nearly 50 miles of hard driving on the track (broken up into several sessions where the car and tires were allowed to cool off) the tires showed very little wear, despite the fact that they were brand new and still had full tread depth. Many performance tires will start chunking if driven this hard will full tread depth, so we were happy to see that we wouldn't have this problem.
Reprinted with Permission |