|
|
Sport Compact Car - December '97Project 200SX SE-RBy Mike Kojima [Put into HTML format by Ken Pratte] With massive power, handling and braking under our belt, we temporarily turn our sights to the car show side of our all-around performer.So far all of the modifications we have made to our Project 200SX
SE-R have been in a concentrated effort to broaden the performance envelope. OK, last
month's stereo upgrade only counts if you include sonic performance, but you get the
point. Since our performance modifications have also had the side effect of adding some
visual appeal, we have occasionally been known to park the car in a car show and actually
do pretty well. Given our accidental success in the show arena, we decided to see what we
could do with a little more effort. In keeping with the latest race car and European boutique car
fashion trends we decided to try a carbon-fiber look for the inside panels. No tropical
rain forest-denuding hardwood for us, we would be using the latest in techno-trim. Trim
Master supplied us with a carbon fiber dash trim kit. Unlike many of the kits currently on
the market that use a printed fake carbon that looks better the further you are from it,
Trim Master uses real carbon fiber finished in a tough, hi-gloss epoxy resin. It's the
real deal, and is easily and permanently attached with special, self-adhesive strips. The
carbon dash kit took about 20 minutes to position--one of the easier installations for
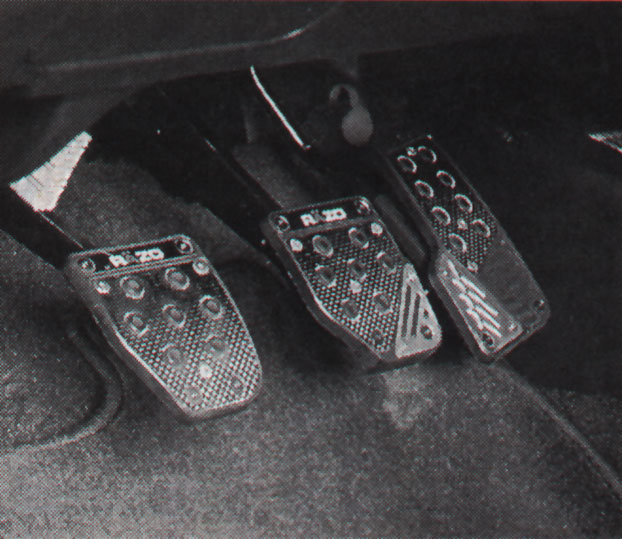
Project SE-R so far. TC Spoilers supplied us with a set of RAZO Motorsports carbon and aluminum pedals. Looking like they're straight out of an F-1 car, these sharp looking pedals can be easily installed by clipping them over your car's stock pedals, but we removed the stock rubber pads first for better feel. Although regarded by many as a simple cosmetic item, these pedals are actually essential on any seriously driven car as they make heel-and-toe shifting a snap. Back in the good old days, it was easy to heel-and-toe downshift in many sports cars. In today's climate of shyster lawyers and frivolous product liability lawsuits, manufacturers are placing the control pedals miles apart to prevent so-called "unintended acceleration" incidents (formally known as driver mistakes). One manufacturer's criteria is to make sure that the pedals cannot be engaged simultaneously when wearing snow boots! So far, they have failed to test hip-waders and swim-fins, but give them a few more years. The shape of the RAZO gas pedal pad helps bring the gas and brake closer together to undo what the layers have done. Another weapon in the war against mediocre shifting is a short shifter from SMC Products. This shifter is unique in the fact that its motion ratio can be adjusted by moving its pivot ball up and down. You can pick any ratio from slightly less throw than stock, to a Hewland-race-box-like super-short throw. We picked about 2/3 of minimum throw for reasonably short, crisp shift action. The SMC shifter's pivot ball is made of self-lubricating delrin, giving it a smooth OEM-like action. With the SMC shifter, the shifting now feels more direct, like a RWD internal linkage box instead of your typical rubbery FWD transaxle feel. The shifter rod is slightly shorter than stock, about 2/3 of an inch, and is chrome plated. In instrumented testing of the EFI system at Jim Wolf Technology, we noted some amazingly quick shift times of about 250 milliseconds with an otherwise stock transmission. That alone could account for a tenth or more off the quarter-mile time. We topped the shifter with an ergonomic carbon-look shift knob from Stillen that completed the look for the dash and pedals.To update the appearance of the dashboard, we installed a white face gauge kit from NR motorsports (310-470-8092). This kit alters the gauges to something akin to the Maxima SE. The normal black gauge faces are now white, affording an easy-to-see, high-contrast style during the day. At night the gauges have a warm golden glow, making them look like the expensive electro-luminescent gauges from a luxury car. The NR gauge faces require you to disassemble the dash--a fairly easy task on the 200SX. The tricky part is removing the gauge needles to replace the faces and getting the gauge calibration right afterwards. We took careful notes as to what the fuel level, the hot idle RPM, and the temperature gauge needle positions were at full operating temperature before carefully removing the needles with the supplied puller tool. After replacing the gauge faces and plugging in the instruments, we started the car and warmed up the engine to operating temperature. We then pressed the needles onto the gauges in the exact same position as our notes. The speedometer needle must be attached with the power on or it will be set about 10 mph too low. This might not be the most scientific method of gauge calibration but it seems to have worked! We used a Genuine Nissan Accessory armrest to fill the rear cubby
hole in the stock center console as the previous set-up looked unfinished. Made of a nice
quality black vinyl, the sharp Nissan armrest is the exact height to actually be
functional. To help organize the trunk compartment and to keep loose objects from flying around under hard cornering and braking, a Genuine Nissan Accessory trunk net was installed. Ok, so this might not be a car show item, but the way we drive, it's definitely a necessity! It was an easy 10 minute bolt-in operation. It is just the thing to hold loose CD's, car detailing stuff, the lug wrench and other small tools. It can also hold groceries-- keeping your milk from smashing into the nitrous bottle and canned veggies from rolling into the subwoofer amp! Since this car has to suffer through the ozone-rich ultraviolet
saturation chamber we like to call Los Angeles, some effort is needed to prevent the dash
from cracking and the interior from fading over time. We had the windows tinted by Mike's
Auto Tinting (714-761-8308) using metallic pigmented, scratch-resistant film for the
tinting operation. Metallic pigments are superior because they do not fade and turn purple
like other cheaper tints. Mike has a unique proprietary method of finishing the edges of
the tint so it goes all the way to the edge of the glass, making the tint job look like
OEM. Mike tinted the side and the rear windows in medium with a super dark, limo tint
windshield border. We hope the medium tint will not attract too much attention from the
police but if you get pulled over, it might be a good idea to roll down the windows so he
can see you and your hands (whether or not your windows are tinted). Many police officers
have been killed during traffic stops so they are understandably nervous. If you help make
the officer feel less nervous and are polite, you have a better chance of being let off
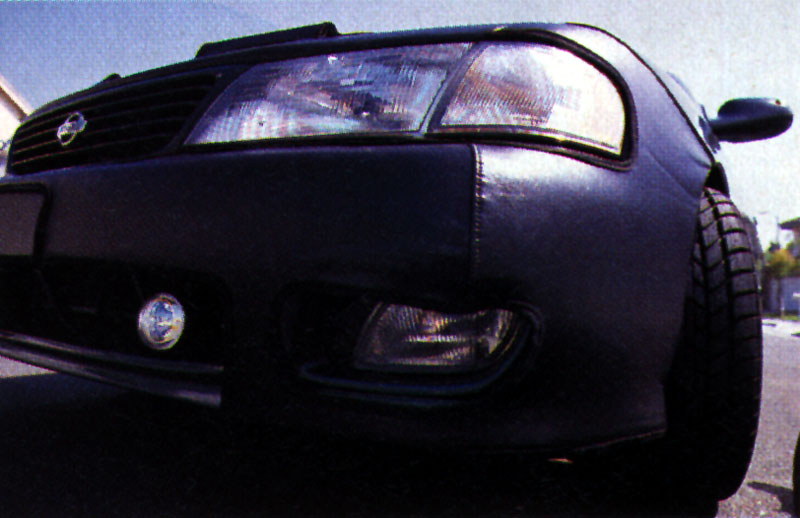
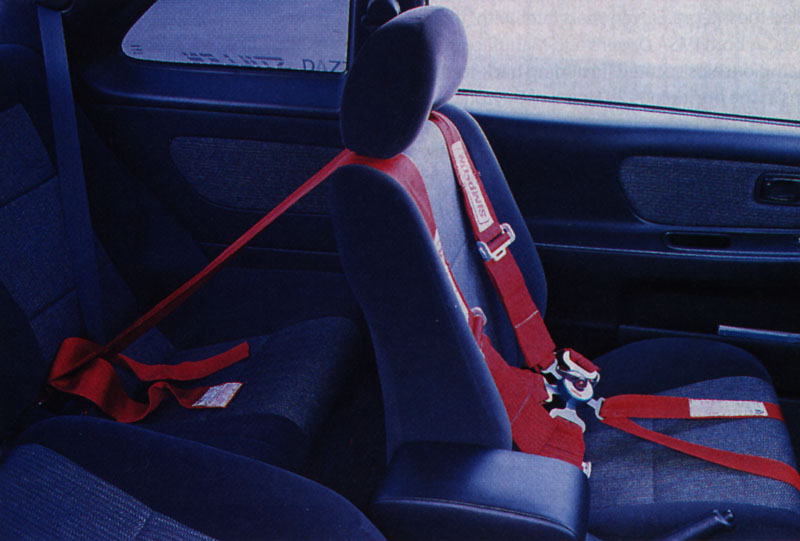
the hook. As a requirement for road course time trials and since it's a good idea for any sort of competition driving, we installed a harness from Simpson Safety Equipment (310-320-7231). We choose a six-point three-inch harness with a quick release cam lock buckle. The six point is good because it uses two anti-submarine straps on either side of your crotch instead of one going up the middle like your typical five point. Lets face it, a five point could divide and conquer your Unit in a crash. We used Simpson's anchor eye bolts in the stock seat belt anchor locations for the lower belts. For the shoulder straps we used the rear seat belt anchors. On cars without a rollcage, this is an important and often overlooked part of harness installation. The shoulder straps must extend from the shoulders at a 45-degree downward angle or the driver may fail to be restrained in an accident. At the next car show take a walk and notice how many sets of racing belts are installed incorrectly. Engine CompartmentWe had an Infiniti G20 valve cover lying around the shop so we decided to polish it and the upper half of the intake manifold. By the way, don't try to do this yourself, it would take an impossible amount of elbow grease to do this by hand. We spent around $125 bucks for a local shop to do it. This made a night and day difference to our engine compartment. No more embarrassment when opening the hood at a car show! We also installed a dry cell battery from Optima (303-340-7440) in Project SE-R. We did not want to have any problems starting the car after cranking the stereo with the engine off (our favorite habit while washing the car). The Optima has 850 cold cranking amps with 125 minutes of reserve power--about twice that of the stock battery. The Optima, because of its gel-type construction, will not puke corrosive acid or vapors all over the engine compartment; this is definitely a big advantage if you like to keep your engine bay immaculate. Because it is less likely to spew all over the place in case of an accident, the gelled electrolyte in the Optima is also safer than many other batteries. A more obscure benefit of the Optima is the fact that it's heavier than most normal batteries. Wait a minute, you say, heavier is better? Believe it or not, many manufacturers place the batteries in a carefully chosen location where they can act as a damper to help cancel out some engine vibrations. Since we installed stiffer engine mounts, engine vibration is much more severe than it was stock. Being slightly heavier than the stock battery, the Optima actually helped serve as a more effective mass damper, reducing some of these additional vibrations. Next, we installed ignition wires, wire separators and power core coil boosters from Nology (619-578-4688). The red accessories pair well with the red Optima battery and complements the blue engine compartment. We did see an increase in performance with the Nology wires but had some interesting side effects (see sidebar). If you buy Nology wires be sure to get the optional separators with them. Your stock wire separators most likely will not fit the 11mm diameter Nology wires. ExteriorTo stay with our theme of building a street sleeper, we were determined to keep the body of Project SE-R stock. No extravagant Veilside body kits for us. We don't mind turning some heads, but we don't want to snap necks! We kept all the exterior changes subtle and tasteful. DAZZ Motorsports, specialists in exotic Japanese wheels, provided us with a couple sets of wheels for Project SE-R. We began with a set of Racing Hart Tracers in 17x7 inches with a 35mm offset. These wheels will likely be the wheels we use when we enter the car in shows. When picking a wheel for a front-wheel drive car, it is very important to choose the correct offset; the offset should remain proportional to the increase in width. Too much positive offset can drastically increase torque steer, even to the point of making the car hard to control. For future performance work (possibly some club time trials and maybe even an import drag race or two) we selected a set of super-light Enkei RPO-1s. We chose a 17x7.5-inch with a 40mm offset to optimize the tire footprint. Ultra low profile tires are sensitive to rim width and 7.5 inches is optimal for the 205/40-17 tire we wanted to run. These racing style wheels have exposed lugs for quick tire changes, light construction and an open, five-spoke design for brake ventilation. We powdercoated the Enkeis bright yellow for a real touring car look. In contrast with Project SE-R's Teal Blue paint the result is rather shocking. So much for a subtle, understated appearance. Most likely we will mount these wheels only for track events for maximum "Exorcist"-inspired head turning effects. While we will still be running the Nitto NT-501s we originally put on the Racing Harts, our track wheels get a set of Toyo Proxes T-1's. Both tires are 205/40-17s, a size that is only 2mm taller than the standard 195/55-15s that came stock. Therefore there will be minimal effects on gear ratio and speedometer calibration. Unfortunately, no race-compound tire is currently available in the recently released 205/40-17 size. While we know that for the ultimate grip we should stick with a 15-inch rim and use a race compound tire, we have to make sure our massive front brakes will clear the wheels. Besides, we are still seduced by the look of the 17-inch wheels. Living in urban areas like our beloved Los Angeles has its risks. Since our attention-grabbing wheels are more-or-less the crown jewels of our exterior mods, we have to--excuse the expression--protect our jewels! To help minimize the threat of our wheels being ripped off, we used Genuine Nissan Accessory locking lugs. These lugs require a special key to be removed, thus increasing the chances that we will remain the owners of our trick wheels. It turns out that Nissan has a lot of accessories to offer for their cars, so we picked up a few other things along with the wheel locks. To help keep the sides of the body from getting chipped and scratched from rocks thrown up by our sticky tires, we installed a set of Nissan Genuine Accessory splash guards. These splash guards are custom molded to the 200SX and blend into the SE-R's side skirts, almost looking like part of a body kit. The splash guards screw into pre-existing holes in the body and are a snap to install. To further protect the paint, we used a Nissan Genuine Accessory nose mask. This high-quality breathable vinyl nose mask has a soft flocked lining to protect the paint and can be installed or removed in minutes. While we're not exactly enamored with the overall appearance of a nose mask, it does protect the paint from dead bugs and rock chips during the drive to work. To protect the car while it is not garaged, like at work, we also picked up a Nissan Genuine Accessory Car cover. The car cover is custom-fitted and is made of breathable, water-resistant Sentrix fabric. Sentrix is unique in that it has a semi-permeable membrane laminated into the base fabric--kind of like Gore-Tex athletic wear. Sentrix works well in fending off the damaging effects of the sun, bird droppings and even rain. Unlike traditional non-breathable waterproof covers, it will not hurt your paint if left on a wet car. To keep the cover from getting stolen, Nissan also has a cover lock available. For a little extra lighting, we fit PIAA 1000 fog lights with ion crystal lenses to the front of Project SE-R. We chose PIAA because their small proportions do not take up much of the grill opening thereby avoiding the chance of hampering engine cooling. PIAA also has the ability to cram a lot of power in those small housings due to the use of expensive, hi-temperature engineering plastics such as Poly Phenylene Sulfide and aerospace silicon adhesives that can withstand temperatures in excess of 400 degrees. Due to the special plastic housing, PIAAs radiate very little heat thereby reducing the possibility that the lights could melt your bumper under low airflow conditions like bumper-to-bumper traffic. The PIAA fog lights are rated at 85 watts and the purple tinted ion crystal lenses project a yellow beam with no loss of lighting capability. (If the lenses were simply tinted yellow, 20 to 30 percent of the light would be lost.) The PIAAs are amazingly bright, brighter than any small fog lamps that we have tried so far. The PIAA's reflector design also seems to have low glare despite their high output--we have yet to get high-beamed by oncoming traffic. Now that we're actually trying, we'll see if we can hold our own on the car show scene. There is a lot more performance in the works as well. In the braking department we are currently working on adding larger rear brakes to compliment the massive anchors we have on the front, and on dialing the front/rear proportioning to match our new stoppers. For handling there is a set of adjustable-perch coil overs coming for the front suspension. And for power, Dan Paramore Racing is taking a grinder to our cylinder head. Stay tuned. Nology spark plug wires (sidebar) We have been hearing about Nology's power-producing spark plug wires for a while now, but we were always skeptical. How could a mere set of plug wires give any noticeable power? Sounded like snake oil to us, so we figured it was time for a test. 
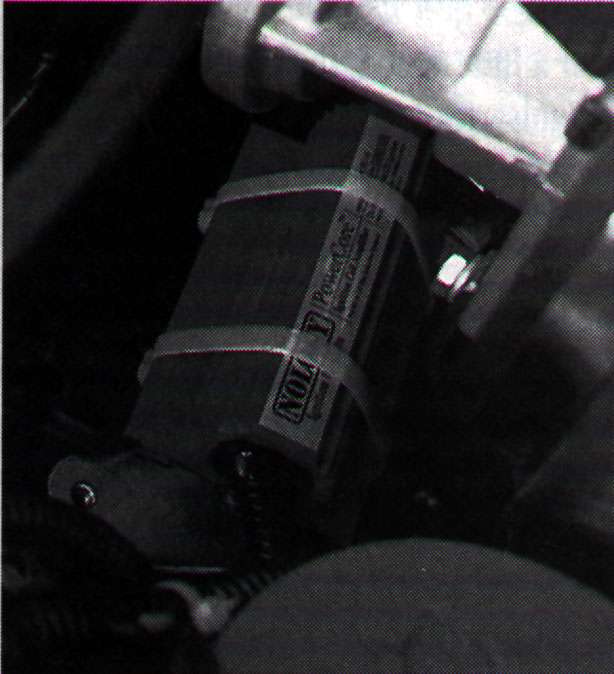
Nology wires contain a large inline capacitor which allows electrical energy from the coil to accumulate in the capacitor until the voltage at the spark plugs reaches the ionization point. At that instant, the entire amount of stored power in the capacitor is released, creating a plasma arc about 300 times more powerful (up to 100,000 watts) than a conventional ignition system's spark, but also almost one million times shorter (four nanoseconds) than the spark from a conventional ignition. Basically, the Nology wires compress the normal spark into a shorter, and therefore more intense, spark. This is the opposite of the conventional wisdom of most high performance ignition systems where the usual scheme is to fire lots of smaller sparks over a large range of crank rotation to improve the probability of ignition (MSD's multile sparks come to mind.) According to Nology, their short spark allows more precise control of timing and reducing the chance of detonation. Whether this is a benefit or not, a shorter spark is the only way to increase spark energy without adding more power to the ignition system. The folks at Nology predicted that the wires would be good for up to a three percent gain in power. Always on the lookout for easy, cheap horsepower, we were game for testing the wires. Skeptics that we are, we also told Nology that if the wires did not do anything, we would report that also. Nology confidently accepted the challenge. Installing the Nology wires was very simple; we removed the old wires and hooked up the new set, bolting their ground straps to the nearest valve cover bolt. Early Nology wires had the reputation for scrambling Nissan ECU's but Nology assured us that these new and improved wires would not. Since the 200SX has a tiny coil built into the distributor, we also
installed Nology's Power core, a mini auxiliary coil which is wired in parallel with the
stock coil. The power core is a great way to get more coil energy storage capacity from
cars with integral coils such as Project SE-R. Nology predicted that the power coil would
not give any additional power while running on the motor but would provide a more reliable
spark under the stress of nitrous. Believe it or not, we started noting improvements as soon as we started the engine. Cold idle was noticeably smoother and hot idle was also slightly smoother than stock. Throttle response was refined, with the engine feeling more eager to pull through the rev range. Still skeptical, we dynoed the car to get some cold hard performance numbers. We tested the wires on Dan Paramore's Dynojet with interesting results. Although the Nology wires did not increase peak power, they increased power and torque everywhere else in the powerband. The greatest increase in power was measured at the torque peak of 4600 rpm where a difference of three hp was recorded. At 3200 rpm, a five lb-ft difference in torque was noted. When we decided to try the Nology wires with nitrous, the NOS system would not activate. The increased EMI (Electrical Magnetic Interference) generated by the Nology wires was scrambling the nitrous controller. After conferencing with Clark Stepler of Jim Wolf Technology, we changed the nitrous controller board's pin configuration to ground inside the ECU case while converting the activation switch to a shielded grounded wire. While we were inside the ECU, we replaced the 10-microfarad filter capacitor that we had inserted in the ground loop earler (See Project SE-R part 3, August, '97) to a 47-microfarad one for increased filtering. These simple modifications cleared up the erratic nitrous operation. Since digital integrated circuits run on pulses of milli-volts, these types of problems are common in the development of any automotive controller. (If you are planning to run Nology wires with a Jim Wolf Technology nitrous controller, be sure to tell the folks at JWT to set you up with the Nology wire filter kit.) After several hundred miles of testing, we have not noted any further glitches in the function of Project SE-R's ECU or nitrous controller. It seems that Nology wires, although perhaps not the first thing you would bolt on the car, may be a worthy investment and a darn easy way to get a little more horsepower.Reprinted with permission |